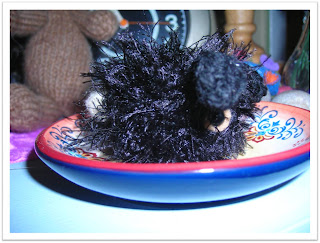

Materials
- Fun fur
- A corresponding shade of sock or fingering weight yarn to twine with the fun fur This is used to strengthen the body and for the ears.
- White sock or fingering weight yarn for the tail
- Short piece of pink yarn or string for the nose
- Tan Felt (optional)
- Yarn Needle
- Safety Eyes ( I believe I used 5mm or 9mm)
- Scissors
- An E crochet hook You can also use a larger hook though I suggest not going larger than an F hook.
Body (Fun Fur & Corresponding Yarn)
1. Ch2 in the 2nd ch from the hook 5sc (5)
2. Inc around the row (10)
3. *Sc1 Inc* Repeat (15)
4. *Sc2 Inc* Repeat (20)
Note: Before adding the eyes, cut a square of felt slightly larger than the eye and cut a small slit to push the eye into the felt. After you add the eyes to the bunny you can then cut the felt to your satisfaction.
5. For the next 4 rounds Sc 20 (20) Add eyes
9. *Sc2 Dec* (15)
10. *Sc1 Dec* (10) Last chance to add eyes or stuff
8. *Dec* (5) Hide tail and finish by pulling tail through the body and cutting off the excess.
Ears (Corresponding Yarn) Make 2
1. Ch8
2. In 2nd sc from the hook hdc back until you reach the slip knot (the beginning chain)
3. hdc2 in the slip knot and continue back down the other side with hdc finishing with a sl st and leaving a tail to sew the ears onto the body. You can use the tail from beginning of the Ch8 to fill any holes from chaining down both sides of the Ch8.
Tail (White)
1. In the circular method (magic loop etc.) start with 6sc
2. Sc (6) sl st and leaving a tail to sew *Note: Do not stuff unless you are using a bulkier weight.
Assemble
*Note: The nose is simply a few small horizontal stitches about where your beginning 5sc were.
For additional cuteness you can use a really small crochet hook to tease the fun fur strands into fuzziness; I also trim a bit of the fuzz off around the eyes and nose.
For additional cuteness you can use a really small crochet hook to tease the fun fur strands into fuzziness; I also trim a bit of the fuzz off around the eyes and nose.
Have fun!

